Wednesday, May 17, 2017

Jenkins groovy script to find the node on which the last build built for a job

The below code is intended to be run in Jenkins script console

Problem

I want to find the jenkins node on which the last build of the job "my-job-name" built. This script determined that, it ran on centos5-x64-01

Code

def getJobs() {
 def hi = hudson.model.Hudson.instance
 return hi.getItems(hudson.model.Job)
}

def getBuildJob(String jobNam) {
 def buildJob = null
 def jobs = getJobs()
 (jobs).each { job ->
 if (job.displayName == jobNam) {
 println("Found")
 println("Exiting job search")
 buildJob = job
 return buildJob
 }
 }
 return buildJob
}

job_name = "my-job-name"

job_id = getBuildJob(job_name)

last_build = job_id.getBuilds()[0]

println("Recent Builds of the job " + job_name + " " + job_id.getBuilds())
println("last_build="+last_build)

println("The last_build of Job " + job_name + " builton the node " +last_build.getBuiltOn())


Output

Found
Exiting job search
Recent Builds of the job my-job-name [my-job-name #1474, my-job-name #1473, my-job-name #1472, my-job-name #1466, my-job-name #1421]
last_build=my-job-name #1474
The last_build of Job my-job-name builton the node hudson.slaves.DumbSlave[centos5-x64-01]

Reference

Jenkins groovy script to list busy nodes

The below code is intended to be run in Jenkins script console

def busy = [];
busy = hudson.model.Hudson.instance.slaves.findAll { it.getComputer().countBusy() > 0 }
out.println("Busy nodes: "+busy.collect { it.nodeName }.join(", "))

Sunday, May 14, 2017

Jenkins Elastic Build slaves with Apache Mesos

In this blog, I'll share my experience of setting up Jenkins server to obtain slaves dynamically from Mesos. You can get the broader picture of this, from the reference links provided in the end.
This is a very simple test setup. Basically install Jenkins, Mesos on my Mac laptop and run a simple hello-world jenkins job, which will get executed on a mesos cloud.

My Environment

  • Mesos - 1.20
  • Jenkins - 2.46.2
  • Mac OS - Sierra (10.12.3)

Installation

  • Mesos - There is no pre-built installer. We need to get the code and build it. Refer http://mesos.apache.org/documentation/latest/getting-started/ for complete details. Below are the commands I ran on my MacBook to install mesos
    • Download mesos code
    • Extract
      • tar -xvfz mesos-1.2.0.tar.gz
    • Install mesos build pre-requisites
      • brew install Caskroom/cask/java (I already had java and hence didn't run this)
      • brew install wget git autoconf automake libtool subversion maven
        • Got errors with git, subversion, maven, since I already had old version. It asked me to upgrade. Upgraded them with below command
        • brew upgrade git
        • brew upgrade maven
        • As per mesos doc, chose to uninstall existing subversion and re-install
          • brew unlink subversion
          • brew install subversion
      • I had python pip & virtualenv and hence I skipped installing them
    • Build the mesos code
      • cd mesos-1.2.0
      • ./bootstrap
      • ./configure CXXFLAGS=-Wno-deprecated-declarations
      • make
      • make check
    • Start Mesos master
      • sudo su -
      • mkdir /var/lib/mesos
      • ./bin/mesos-master.sh --ip=127.0.0.1 --work_dir=/var/lib/mesos
    • Start mesos agent
      • Open new terminal
      • cd mesos-1.2.0
      • ./bin/mesos-agent.sh --master=127.0.0.1:5050 --work_dir=/var/lib/mesos
    • Test/Verify your mesos
      • Browse http://127.0.0.1:5050
      • Run test frameworks
        • C++:   ./src/test-framework --master=127.0.0.1:5050
        • Java: ./src/examples/java/test-framework 127.0.0.1:5050
        • Python: ./src/examples/python/test-framework 127.0.0.1:5050 . It gave me error and I didn't bother to troubleshoot it
  • Installing Jenkins
    • Download jenkins-*.pkg file and install it on your laptop
    • Refer https://jenkins.io/download/
  • Install Jenkins mesos plugin
    • Browse your local jenkins : http://localhost:8080 -> Manage Jenkins -> Manage plugins -> Available -> Search Mesos -> Install and reboot jenkins (if required)
  • Configure mesos details in your Jenkins
    • Browse to http://localhost:8080/configure -> Cloud -> Add a new cloud
    • Give the mesos client binary path under "Mesos native library path". Since I have built mesos in Mac, the shared library will be "libmesos.dylib". For linux it will be libmesos.so
    • Provide the "Mesos Master [hostname:port]", Description and retain the rest of defaults. By default the mesos host label will be "mesos". You need to use this label while configuring job
    • Test the mesos connection by clicking "Test Connection"

Configure Jenkins job to use mesos

  • Create a simple HelloWorld Freestyle project
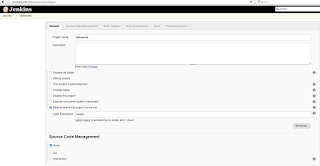
  • Importantly, you need to specify the label "mesos" under "Restrict where this project can be run"

Test

  • Run the HelloWorld project
  • As you can observe, this job got executed on a mesos host mesos-jenkins-ddd4afdc45d7490c80a9706889044586-mesos

Reference